Portable battery packs aren’t one of the 10 Essentials for hiking, but you could make a strong argument for advising most hikers and backpackers to carry one. If you use any form of technology on a hike, like a smart phone or GPS device, for photos and/or navigational purposes, I highly encourage you to carry one.
One of the more common questions I get asked when I broach this subject with friends or in my Facebook Group is what size power bank they need and what features to look for with it. Let’s go over the basics and hopefully get you steered in the right direction with all the choices!
This article isn’t meant to be overly comprehensive and exhaustive in its content, by the way. Many folks like to delve much deeper in the world of electronics than I care to, so I tried to “skim the surface” of what most people need to take into consideration when purchasing a battery pack. That being said, please feel free to leave a comment if you find any of this information out of date (with a reference to your updated info, please) or want to share further knowledge with folks.
Capacity of Battery Packs
Theoretical versus Realistic Capacity
The capacity of battery packs is measured in Milliamp hours (mAh), and represents how much power the battery can provide per hour.
For example, if you device calls for 1000 mAh per hour, a 10,000 mAh power bank will keep it alive for 10 hours (10,000 divided by 1000 equals 10); however, some of the power is going to be lost in the AC/DC conversion and through the cables you use. A quick Google search is usually all you need to do to find the capacity of your device’s battery.
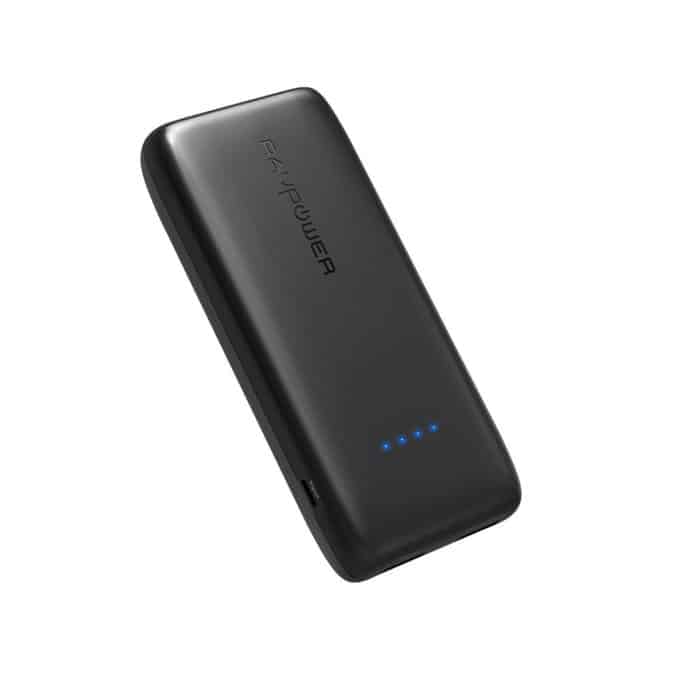
Some brands, like Anker, have a solid reputation of delivering 80-90% of their listed capacity, so it pays to pay attention to the brand you purchase. Anker, Jackery, and RAVPower are three brands that I read favorable reviews on consistently (for what it’s worth, I have this model of the RAVPower brand and have used it for years with great success).
At a minimum, you want a battery pack that can charge your device(s) one time. So keep that in mind when you are looking at the smaller mAh battery packs.
Also, remember that with increased power comes increased weight and size. If you’re just going to use a battery pack on a day hike over a weekend, you might not want to invest in or carry the weight of one with a lot of capacity. Conversely, if you’re going on a multi-day backpacking trip, it would be wise to consider a battery pack with added power, to recharge your device more than one time, if you use it for navigational purposes and/or photos.
Tips to Increase Capacity
Because there will be a discrepancy with the capacity stated by the power bank and the realistic amount you’ll get from it, you’d be wise to follow these tips to get the most from your power bank:
- Temperature: Keep the power bank from getting too cold. Cold temperatures will drain the life out of most electronics at a more rapid rate.
- Battery Percentage: It’s best to recharge your device before it dips to less than 20%, versus waiting for the power to fully deplete.
- Quality of Cables: The quality of your cables matters with power banks. Charging will be faster and you won’t lose as much potential power, so do your due diligence when purchasing them.
Charging Time
Keep in mind that charging your battery pack and charging your device with that battery pack are different.
For most hikers, the time it takes to recharge their battery pack isn’t a big deal since they won’t need to use it immediately on a hike again (unless you’re really lucky to have more than a weekend off to hit a trail!). Conversely, someone thru hiking a long trail, such as the Appalachian Trail, may need a battery pack that recharges itself more quickly, since time in towns is usually kept to a minimum.
You also want to pay attention to how fast the battery pack will charge your phone. Nothing is worse than wanting to have access to your phone regularly on a beautiful hike, to take a bunch of photos, and it’s stuck inside a backpack pocket charging it self for hours on end.
Fast chargers are also better equipped to quickly charge larger batteries such as those in iPads and laptops.
Extra Features
Some battery packs have extra features that may appeal to hikers:
- Built-in Flashlight: My RAVPower battery pack has this feature, and it is admittedly nice to have on occasion if its close by but my headlamp isn’t. It can also double as a backup light source in your backpack.
- Dual Charging Ports: If you’re hiking/backpacking with a significant other or friend, and you want to save weight and use one battery pack for charging purposes, this might be a feature you want to look for.
- Qualcomm Quick Charge: Purchasing a device with Qualcomm Quick Charge technology will rapidly accelerate the rate of recharging your devices. Here’s where you can learn more about Qualcomm Quick Charge and which devices have this feature, which cables you need, etc.
- Power IQ: Anker products give consumers the option of this technology in their products. Power IQ technology will identify the device you’re charging and charge it as quickly as possible.
Recommendations for Battery Packs
The options for battery packs are mind boggling, and I usually take a “less is more” approach with my recommendations to prevent “paralysis by analysis.” Here are a couple of options with a solid reputation in the industry.
For day hiking or short backpacking trips, when the time it takes to recharge your battery pack isn’t a big deal, this Anker battery pack is a good choice for both its price point and its charging capabilities.
A battery pack with significant power and a solid reputation amongst backpackers and hikers for its ability to recharge both devices and itself quickly as well as provide lots of charging capacity is this one made by Anker. It’s pricey though, and likely overkill for most weekend warrior type hikers.
The best advice I can give you beyond this article, is to keep your phone in airplane mode and on the battery saving setting. Even with those two features activated, it’s still easy to run out of “juice” sometimes, even on a day hike.
Do you have a favorite battery pack you can recommend? If so, or if you have a comment to share about this article, feel free to leave it and pay it forward to the hiking community by helping educate others with your knowledge. 🙂
Happy trails,
Nancy